Does this look familiar? It should. A recent post used this same design in summery bright, fun colors. Since we're approaching the 4th of July, I gave it a patriotic twist with the red, white and blue! Isn't that fun!! Makes me happy. And, added a few little dots of white on the border and the flamingo with the signo white gel pen (because it's awesome!).
And, check out the patriotic watercolor tropical flowers! Again, a little white signo gel pen action and there's also wink of stella for shimmer which adds to the pretty factor.
This the last day for the June Collection so order today to ensure you can have these wonderful sets (Be Yourself and Tropical Flowers) as part of your personal stamp collection! www.amusestudio.com/seleise
Have a wonderfully creative day!
Showing posts with label a|s thank you. Show all posts
Thursday, June 30, 2016
Monday, June 20, 2016
Thanks a Latte Summer Coffee Lovers Blog Hop
Welcome to the 4th day of the Summer Coffee Lover's Blog Hop. I'm back with the retiring A Muse Studio Perk Up stamp set and have cut off the sides of the diecut cup so I didn't have to add a wrapper. I wanted the strawberries to stand out! And, I wish you could see but there's wink of stella on the strawberry blooms and the strawberries too. So shimmery and lovely! This fabulous strawberry background is coming in the July monthly collection. So fun!
Here's a close-up of the cup with a little vanilla twine tied around. Isn't it a pretty stamp?
Have a fabulous day and hope you'll keep hopping with us!
Shop online anytime for a muse studio products!
Here's a close-up of the cup with a little vanilla twine tied around. Isn't it a pretty stamp?
Have a fabulous day and hope you'll keep hopping with us!
Shop online anytime for a muse studio products!
Friday, August 7, 2015
Thanks so much!
What happens when you mix kraft with blackberry, apricot and mermaid? Awesomeness!
Add the sequins and pearls and what a happy little card filled with thankfulness.
Here's the inside. Doesn't the sentiment look great on the stitched circle die?!
All of the supplies are in my webstore: www.amusestudio.com/seleise
Have a wonderfully creative day!!
Add the sequins and pearls and what a happy little card filled with thankfulness.
Here's the inside. Doesn't the sentiment look great on the stitched circle die?!
All of the supplies are in my webstore: www.amusestudio.com/seleise
Have a wonderfully creative day!!
Tuesday, December 30, 2014
You're My Inspiration - Splash/Shimmer Background
Hello! I hope you had a most wonderful holiday and are making preparations for a wonderful New Year! I had a relaxing time with my mom. We played games and put together a puzzle and did a little shopping too. Christmas celebrations came in spits and spurts due to busy schedules and it worked out wonderfully! Now it's time to start getting organized as the craft fair season and a busy fall calendar has left my space in shambles. Maybe I can be a little more organized in 2015 (hahaha - I crack myself up!).
Before I gather with some friends to bring in the new year, it's time to do some thank you's for the wonderful presents received as well as wonderful people in my life! Here's one idea to start the ball rolling.
What happens when you mix berry and marshmallow splash, Peerless shimmer metallics in Copper and water?!! An AWESOME background! I was going to use silver because that makes more sense with pink, right? But, I picked up copper instead and it mixed beautifully into the berry so encourage you to try that combo! Don't wait too long to pick up your Peerless shimmer metallics as they go away when the holiday catalog expires tomorrow night (December 31, 2014) at midnight.
Look at it close up! Could it be more wonderful? And, the Dance silhouettes look fantastic on the shimmery mottly background, don't you agree? Some twinkle stickers finish off the look.
Here's the inside - simple and sweet and lovely.
Shop here to get the peerless and splash: www.amusestudio.com/seleise
Have a wonderfully creative day!
Tuesday, October 14, 2014
Thanks - A Partial Word Die-Cut and Modified Z-Fold Card Tutorial
What happens when you take one of the fabulous word dies from A Muse Studio and only cut part of it out? Awesomeness! That's what happens - awesomeness! :)
Here it is from an angled view to the side - you get the modified z-fold effect this way. You take an 4-1/4" X 11" piece of sugar cardstock and score it at 2-3/4" and 5-1/2". Put it aside and work on the die cut part. You could do it directly on the cardstock fold but I decided to make it a little easier.
Take a piece of 4-1/4" X 3-1/4" piece of cardstock. I used hibiscus as it was a great match to the patterned paper I picked to use from the Fiesta paper pack.
Center the word die at the top center of your 4-1/4" side of the cardstock.
Turn the cardstock 180 degrees and line it up so the top of the die is on the cutting plate and the bottom of the die and the rest of the cardstock is hanging off the edge a little. Use a little washi tape to hold it in place.

Add the cutting plate on top and as you can see, a bit of the word die is hanging out of the edge. You don't want the bottom part of the word to get cut that's why you need part of it to be outside of your cutting plates. *note - make sure your die is straight before you cut it out. I took the photo and then realized that I was askew so fixed it before cutting. ah... the little things. :)
Once you cut it, you have this lovely result. Okay - you actually have all the little pieces that you need to trim off from the letters but after you do that - you have this lovely partially die-cut word. :) Layer that piece on the fold and trim to a straight line. Then, layer a patterned piece on the bottom edge to finish off the card.
I cut out the full word on a piece of the patterned paper and used a quickie glue pen to attach it to the top of the partial cut layer. You wouldn't have to do that but I liked the look of it. :)
Oh - I also added a top layer of patterned paper that I cut with the medium scalloped border die. A tiny strip of hibiscus finished off the look.
This would be so fun to do with the Merry or Noel die and add a little Santa Mail stamp or Cozy Back stamp to it. Will have to do some more playing.
Hope you enjoyed this tutorial and hope you'll give the partial word die-cut technique a try!
Here it is from an angled view to the side - you get the modified z-fold effect this way. You take an 4-1/4" X 11" piece of sugar cardstock and score it at 2-3/4" and 5-1/2". Put it aside and work on the die cut part. You could do it directly on the cardstock fold but I decided to make it a little easier.
Take a piece of 4-1/4" X 3-1/4" piece of cardstock. I used hibiscus as it was a great match to the patterned paper I picked to use from the Fiesta paper pack.
Turn the cardstock 180 degrees and line it up so the top of the die is on the cutting plate and the bottom of the die and the rest of the cardstock is hanging off the edge a little. Use a little washi tape to hold it in place.

Add the cutting plate on top and as you can see, a bit of the word die is hanging out of the edge. You don't want the bottom part of the word to get cut that's why you need part of it to be outside of your cutting plates. *note - make sure your die is straight before you cut it out. I took the photo and then realized that I was askew so fixed it before cutting. ah... the little things. :)
Once you cut it, you have this lovely result. Okay - you actually have all the little pieces that you need to trim off from the letters but after you do that - you have this lovely partially die-cut word. :) Layer that piece on the fold and trim to a straight line. Then, layer a patterned piece on the bottom edge to finish off the card.
I cut out the full word on a piece of the patterned paper and used a quickie glue pen to attach it to the top of the partial cut layer. You wouldn't have to do that but I liked the look of it. :)
Oh - I also added a top layer of patterned paper that I cut with the medium scalloped border die. A tiny strip of hibiscus finished off the look.
This would be so fun to do with the Merry or Noel die and add a little Santa Mail stamp or Cozy Back stamp to it. Will have to do some more playing.
Hope you enjoyed this tutorial and hope you'll give the partial word die-cut technique a try!
Tuesday, September 16, 2014
Mini Blooms Thank You - Ribbon Detail Tutorial
Watermelon and eucalyptus ink and the mini blooms stamp set. Isn't that a great combo?! The corner chomper adds great detail as well. A large flax paper flower was pressed into the watermelon ink to get the coverage and a silver sequin finishes off the look. :)
Here's the inside. I carried the leaves and flowers in to finish off the card.
But the real story on this card is the ribbon detail. I love how this came out. I was experimenting with tying a ribbon across the front of the card but didn't want the same ribbon look that I've done before. So, I punched a couple of holes and tied the ribbon but it wasn't quite the look that I'd hoped for so now what to, what to do because there are a few holes in the front of the card. lol!
I stamped the sentiment from Beautiful Birthdays and pondered. Then, it hit me. I pulled out my handy x-acto retractable knife and cut a slit in the fold of the card. The slit is just about the same width of the ribbon and is on the fold at the same height as the punched holes so the card can have the same ribbon detail on both sides of the card even with a fold.
To make the ribbon detail, cut about 13" of ribbon, start from the back and pull it evenly through the two holes. Wrap the ends around the side of the card going away from the center. Go through the slit on one side going front to back and wrap it around the right side. Bring the ribbon back through the same hole it started in from back to front and tie it around itself and trim the end. Does that make sense?
To clarify, take the piece of ribbon that came up through the left hole and thread it from front to back through the slit on the left side of the card at the fold. Turn the card over and take that ribbon from the back to the front through the same hole you started with - the left hole. Turn the card back to the front. Take the piece of ribbon and tie it around and trim. See how it looks above.
See below for how it looks on the back.
What do you think? It gives a subtle touch to the inside of the card and since it's one layer across on top and bottom, it doesn't make for a bulky mailing.
Stamps: Mini Blooms
Cardstock: Eucalyptus and Sugar
Ink: Eucalyptus and Watermelon
Tools: Corner Chomper, X-acto craft knife and crop-a-dile
Other: flax flowers, silver sequins, mini glue dots and silver 1/4" ribbon
These items and so much more can be found in My Webstore!
Have a wonderfully creative day!!
Wednesday, August 27, 2014
Merci
A sweet Parisienne scene thank you card. And, it's topped off with the new mini bow die! Love this tiny bow! And, doesn't it look fabulous in this lay-out? I love it! In fact, I love this Navy, Grass and Kraft combo, don't you? I added touches of navy petite pinstripe and navy petite polka dot to finish it off, as well as inking the kraft layer with grass ink after stamping the scene in Navy.
After I stamped the kraft layer, I opened up the card and stamped the inside with the same scene. So, ink once and stamp twice and you get a great shadow layer which is light enough to add your French thank you (merci) on top.
I also made this same card with the August paper pack. I love this version too with the cherry, onyx and kraft cardstocks too. :) I played around with a sugar mini bow and added some glitter to the edges and the center to see how it would look. I like the idea of it but might try some other options. :)
Here's the inside.
What do you think of my Parisienne thank you cards? Which color combo do you like better?
Want to make your own? You can - here's where you get the supplies: www.amusestudio.com/seleise
Have a most wonderful day and thanks for visiting my blog!!
Tuesday, August 19, 2014
Thanks a Latte
Another coffee card! You might see a lot of these because I love these new sets! And, the matching dies are FABULOUS!! This is from Perk Up. The mini bow was added on top because it's just so cute! This is an A1 card and the front is a little smaller than the back so that you can see the red strip when the card is closed!
This is also made from the August paper pack. Such a great combo! What's the August paper pack? Check out my last blog post by clicking here! :)
And, here's the inside. How cool is this?! Simple but great and the sentiment and fonts are awesome, don't you think?!
Have a wonderfully creative day!
This is also made from the August paper pack. Such a great combo! What's the August paper pack? Check out my last blog post by clicking here! :)
And, here's the inside. How cool is this?! Simple but great and the sentiment and fonts are awesome, don't you think?!
Have a wonderfully creative day!
Monday, August 4, 2014
Marisa's Pocket Full of Posies
Marisa made an amazing pocket full of posies card using the new fiesta stamp set and matching die. Who would have thought to take a wonderful banner die and use it as a pocket?! And, then she filled it with fabulous crepe paper vintage-y flowers. Isn't that adorable! She's so creative! And, guess what? She made an awesome video tutorial on the flowers and how to put the whole card together!! Here's the link:http://kitchentablestamper.com/2014/06/how-to-make-crepe-paper-flower-embellishments/
I used different colors because that's what I had on hand in my A Muse crepe paper stash. But, the beauty is that it looks good with a variety of flowers and colors and it's just so cute and fun! I hope you'll give this card a try. I'm sure glad I did!
To pick up your own card supplies, visit my webstore: Seleise's A Muse Online Store
Have a wonderfully creative day!!
Friday, July 18, 2014
Thank You - Beautiful Birthday style
Here's another Beautiful Birthdays stamp set card. It's soft and pretty. the flowers look gorgeous layered and a little inked up buttercup adds the perfect finishing touch.
www.amusestudio.com/seleise
And, check out my sale page (top tabs on blog or click below) as coming August 1 is a special holiday sale!
http://amethystcat.blogspot.com/p/a-muse-studio-specials.html
Have a wonderfully creative day!!
www.amusestudio.com/seleise
And, check out my sale page (top tabs on blog or click below) as coming August 1 is a special holiday sale!
http://amethystcat.blogspot.com/p/a-muse-studio-specials.html
Have a wonderfully creative day!!
Thursday, June 19, 2014
Masked Sentiment - Thank You
What happens when you place an 1-1/4" mask on your card? You get a great space to highlight a sentiment. This masked sentiment card features the modern zinnia stamp set in bubblegum and ocean inks and the sentiment from Thank You Mix. The stamped layer is on pebble cardstock and is edged in memento tuxedo black ink and then layered on a bubblegum card base.
There is a slight edge gap from the mask as I used a thin cardstock for the mask. I tried using typing paper but the ink bled through so decided the slightly thicker mask worked even with the gap. The masked edge is made using the Copic .3mm multiliner. Great pen!
Here's the inside - lots of flowers and joy to spread your thank you to the recipient.
I encourage you to try this technique sometime. It's fun and has lots of possibilities. I will definitely be trying it again! And, have you noticed that I can't get enough of Modern Zinnia? Dang - I love that stamp set! So glad it didn't retire! If you'd like to add it to your collection, here's the store link: www.amusestudio.com/seleise
And, the new catalog is coming July 1st! E-mail me if you'd like to order a copy. I'm charging $5.50 + shipping (that's a saving of $4 off the retail price of the catalog!)
Have a wonderfully creative day!!
Monday, January 27, 2014
Modern Zinnia - Thank You!
I thought the next card posted would be the one from my last post. By the way, speaking of my last post, I didn't realize that the instagram photos wouldn't come through the blog feed reader so I'll go back to inserting actual images rather than embedding the instagram photo. My apologies for that!
So, on to the thank you card. This card is quick and simple but looks like it takes more work than it actually does. Those are my favorite kind!
The top layer is sugar. It's stamped in grapefruit ink with the large solid zinnia stamp from the Modern Zinnia stamp set. Stamp once with the stamp inked up and then without putting it in the ink pad again, stamp a second time (stamp off). This gives a darker and lighter look. Repeat until the card is full. Then, pick one spot to stamp the small zinnia in cherry ink. Thank you from hand-scripted was stamped in versafine ink over the top.
The sugar layer was layered onto mushroom cardstock then cherry baker's cording was wrapped twice around both layers and tied into a knot. A small length of cherry and small length of blush cording were also tied around on strand of cording. That layered piece was popped up on cherry pinstripe cardstock. Don't you love it?
Here's the inside. Stamp off the large zinnia and stamp on the small cherry zinnia. Then, add the sentiment in versafine.
Simple and pretty!
You could make this card in so many colors and for so many occasions. It would make a great card set for a gift too!
If you'd like to make your own, the supplies are available in my webstore, 24 hours a day.
Happy Stamping!
Sunday, November 24, 2013
Silent Night One-Layer Thank You Cards
Simplicity can be beautiful. I love the quiet simplicity of these cards because of the message portrayed in the silent night stamp set. It's nostalgia. It's home. It's calm and it's thoughtful. It's the message I want to send.
So, in the previous post, you can see the On Dasher One Layer Thank Yous and here's the Silent Night version of the one layer thank you cards. It would be pretty as a set or just as a single card. This one is Silent Night stamped in French Roast and edged in Cobalt.
This one is edged in grass.
And, this one is edged in Heather.
Here they all are together so you can see how pretty they'd be as a set or how pretty they'd be used as a single thank you for someone who brought some joy to your life this winter. I love that it's perfect for the holidays but is versatile enough to be used all through the winter months. What do you think?
Stamp sets: Silent Night, Graceful Greetings
Inks: French Roast, Heather, Cobalt and Grass
Cardstock: Kraft
Thanks for stopping by my blog. Have a wonderfully creative day!
Friday, November 22, 2013
On Dasher One Layer Thank You Cards
Here's another one-layer version of the On Dasher set, this time as Thank You cards. Isn't it pretty? I just love apple, french roast and cocoa on kraft! I need to try it with cobalt or navy too but I can't seem to stop using apple!
Here are a couple of vertical versions too!
Shop Online to get supplies to make this quick and easy card!
Stamp sets: On Dasher, Graceful Greetings
Ink: french roast, apple, cocoa
Cardstock: kraft
Have a wonderfully creative day!
Here are a couple of vertical versions too!
Shop Online to get supplies to make this quick and easy card!
Stamp sets: On Dasher, Graceful Greetings
Ink: french roast, apple, cocoa
Cardstock: kraft
Have a wonderfully creative day!
Wednesday, July 10, 2013
Masked Circle Thank You
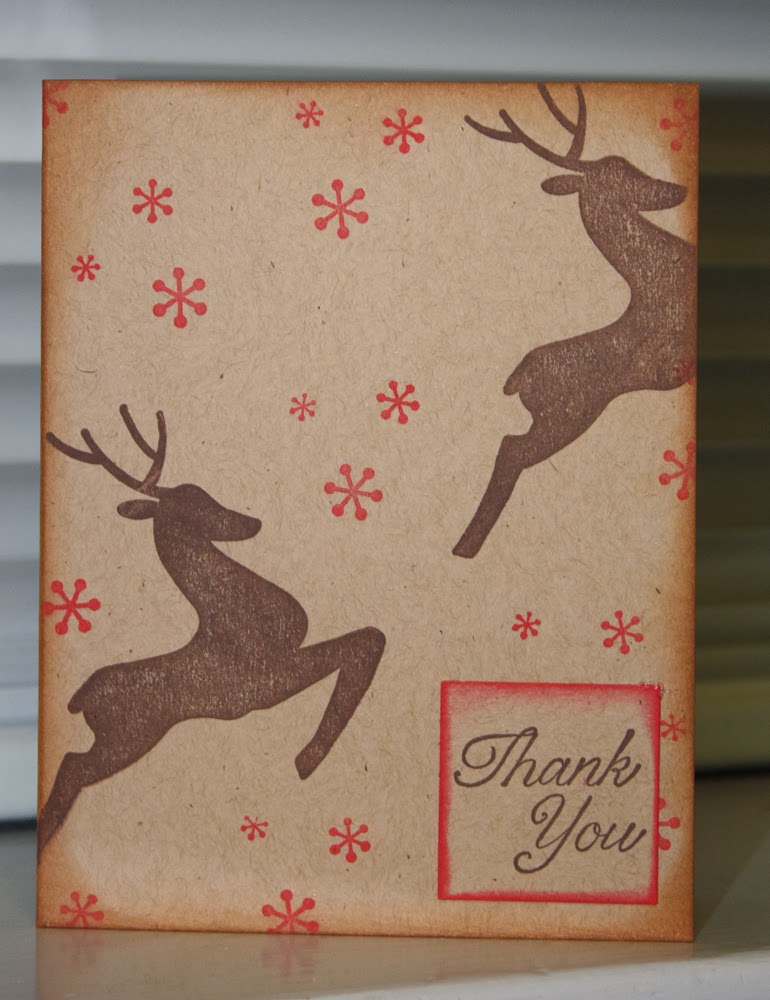
This little beauty is another card from stamp camp. The photo is blown out a little from being in the bright sun and was slipping off the easel but did I fix it - nope! lol! sorry. :)
This card was inspired by an a muse studio design that I tweaked. It would be wonderful for a set of notecards, thank you cards, birthday cards, get well cards and more. Also, you could do it with a ton of different colors. I will definitely be using this design again. :)
Tools & Supplies:
Stamp Set: Making a Difference, Friend to Friend
Cardstock: Sugar, Wasabi, Vellum Cardstock
Ink: Memento Tuxedo Black, Bermuda, Wasabi, Poppy (aka: burano)
Classic Circle Nestabilities Dies
Butterfly Trio Die Set
Mini Glue Dots
Vanilla Satin Ribbon
Die cutting machine
Sponge dauber
Cutting Instructions:
Sugar Cardstock Base: 7” x 5”
Wasabi strip: 1/2” x 3 1/2”
Vellum Cardstock (die cut small butterflies)
Cut a circle mask using a spellbinder circle and typing paper or light cardstock.
Instructions:
1. Score Sugar cardstock at 3 1/2” to make an A1 card.
2. Die cut circle mask (pre-cut)
3. Place mask over card-front and hold in palce with washi tape.
4. Sponge bermuda around lower 2/3 of circle. about 1/4” in
5. Stamp leaves in wasabi over sponged area.
6. Stamp floral in poppy ink over wasabi leaves.
7. remove mask
8. Stamp sentiment in Memento Tuxedo Black.
9. Wrap ribbon around Wasabi strip and adhere
10. Adhere vellum butterflies with glue dots.
All supplies are a muse studio and can be found in my webstore: www.amusestudio.com/seleise
Have a wonderfully creative day!!
Friday, June 14, 2013
Chalk Popping Thank You Card
I'm still in a chalk mood so here's a chalk popping card. Do you know what chalk popping is? You stamp your image (in this case - modern zinnia stamp set) in versamark and then dip your pom in the chalk color of your choice and rub it over the versamark. The image appears as if by magic and is so pretty and subtle. On this image I used the orangish yellow shimmer chalk color on the vanilla cardstock and then put some salmon chalk over the top (the top two colors in the upper left corner of the shimmer chalks - the darker shades). Isn't that pretty? The vanilla circle is layered on a eucalyptus scalloped circle. The leaves are stamped in eucalyptus on kraft. And, then to mix it with orange!!! What?! I know!! That was a random happy accident. I never would have thought to put those two colors together but I love it. What do you think?A little french roast twine finishes off the look. :)
Here's the inside. This sentiment is from the aren't you sweet stamp set which I posted about recently (the tea cup set) and the front sentiment is from graceful greetings. Oh - and you probably notice but this card opens to the top so the base is 4-1/4" X 11" and is scored at 5- 1/2".
So, pull out your chalks and get to popping. You'll be happy you did!
All supplies are from a muse studio and are available in my webstore: www.amusestudio.com/seleise
On a different note, I'm looking forward to being part of a Christmas in July blog hop. Save the date and be sure to check in on July 8th!
Have a wonderfully creative day!!
Sunday, August 26, 2012
Thank You (Avian Notes)
What happens when you mix lichen, sage, buttercup, bellini solids with titian and bellini patterned cardstock and with a fun card sketch from Papercrafts? This! :)
The avian notes stamp set is so wonderful and has the fun graphic "trees" and birds and some great sentiments in a beautiful font!
The photos are a little fuzzy- sorry about that. But, as you can see - fun mix of papers and a look that would work well for a masculine card too.
Hope you're having a most wonderful week-end! Happy Stamping!
www.amusestudio.com/seleise
Friday, December 16, 2011
Blackberry Shimmer Damask Thank You
Shimmery wonderfulness!!! Seriously - the a muse studio shimmer papers are DIVINE!!! They are a little "spendy" but if you compare them to buying a $5 card for a special occasion, they're not "spendy" at all.
This is a super simple and yet beautiful card with a soft shimmer. It features the blackberry damask and the butterfly die. The butterflies are cut from the opposite side of the blackberry damask cardstock. It's shimmery too!!! I paired the shimmer with the regular blackberry cardstock and it goes wonderfully together. The butterflies are just glued in the center so they look like they just landed on the card.The shimmer paper is layered on a sugar card base. It helps stretch the use of the more expensive paper.
Inside is a simple Thank You from Avian Notes in blackberry ink. Isn't the font pretty? A clean and simple card to let someone know you care about their kindness. What do you think?
I'm heading to a crop this week-end so plan to stamp up a storm. Maybe I'll get my Christmas cards made. I'm only 3 years behind. And, yes, I know it's ironic for a cardmaker to not get her own cards out. I'm usually filling other orders and don't get my own projects done. That's a good problem to have, right?! :)
Have a wonderfully creative day!
Shop online anytime: www.amusestudio.com/seleise #1379
Subscribe to:
Posts (Atom)