Pages

Showing posts with label 3-D. Show all posts

Wednesday, June 8, 2016

Flower Garden Box Card

Okay. This is embarrassing! I have been making cards and have been gardening and have been spending time with family and have been working and I guess I have not been updating my blog. yikes! There has been some instagramming and Facebook posting and I guess I need to get my blog back on track. Here's a box card that I made during May for Mother's Day. My mom loved her pop-up bouquet and the class peeps had fun making them too. (after they stopped cursing me! lol)
The template to make this card is at the bottom of the e-mail. I was inspired by several box card templates that I saw online and tweaked them a little.
Die sets used: Flowers die set (p.86 $9.99), Love and Thanks die set (p.16, $23.99) and Butterfly die trio (p.84, $8.95). Oh and the grass border die was also used. That's so great for grass or halloween goo or winter icicles.
The butterflies are cut out of the Everything's Rosy paper pack and are mounted on crystal clear cardstock.
You can use all kinds of scraps to make beautiful gardens. And, you can easily make this a birthday or anniversary or get well card! Essential Sentiments Too is an awesome sentiment set that will give you options for almost all the holidays!
The reverse polka dot apple cardstock is the perfect base for this happy bouquet.
Here's the template! Have fun making box cards of your own!

www.amusestudio.com/seleise 

Happy stamping!
Seleise

Wednesday, January 22, 2014

Fry Box Fun!


Spent some time playing around with the flower die set 1. Aren't they pretty all layered up and crinkly on a navy polka dot fry box! Yep. I love the fry box die and the flowers play off it beautifully. Now, the question is, is it done or will it have ribbon and bling added? Time will tell. :) Have a wonderfully creative day!

Friday, August 30, 2013

Bootastic Treat Bag (Flat Bag to Gusset Bag)

Check it out! This started as a flat treat bag and with a few simple steps, became a gusseted treat bag. It opens up a whole new world of treat bags with our line of flat bags. :) I saw the tutorial on Melissa Roell's blog (she's amazing!) and knew that I had to try it. I added a sugar panel with the sentiment stamped in grape and the ghosts in onyx from the Happy Haunting stamp set. A little grape ghost, some silver edged organdy ribbon and black baker's twine finished off the look! Use the large hole on the crop-a-dile for your holes. :) I hope you give Melissa's tutorial a try. So easy and so fun! 

 
Thanks for popping by and have a wonderfully creative day!!

Monday, July 8, 2013

Christmas in July Blog Hop!!

I'm so excited to see all the wonderful Christmas projects and cards created in this Christmas in July Blog Hop. This hop was put together by the fabulously talented Stacy Rogers! If you haven't ever visited her blog, you're missing out on some wonderful color combinations and beautiful CAS designs. She has inspired me with her stamped backgrounds and I'm honored to be in her hop!

So, without further ado, here are my Christmas projects...
 Here are all the projects together. I focused on cherry, sugar, vanilla, silver and kraft - kind of a vintage-y feel. :)
Any Sound of Music fans out there? Here's my brown paper package tied up with string. :) Well, technically it's tied up with the yummy silky crush ribbon but there is a little cherry/white baker's twine on top. :)
 Love the candy box die! Here are several different versions. You've got a  Twas the Night Before Christmas box, a Candy Cane Stripe box and a Cherry box with the small mitten die cut out of it and a candy cane strip insert inside. The snowman cut-out is on top of the mitten and the Christmas tree cut out is on the brown paper package in the previous photo. The candy boxes with the clear openings have a big of crystal clear cardstock taped inside the box.
Check out the snowman and the silver tree on the cherry chevron rosette. A few sky twinkle stickers finish off the look. I love bling. Wouldn't this be great on a gift bag or on a big package? Or, punch some holes, add some ribbon and make it into an ornament. :)
And, here's a different rosette. This one is made out of cherry petite polka dot and has a silver vintage die cut with some poinsettia die cuts on top alternated in cherry and cherry chevron. Some twinkle stickers and pearl stickers finish off the look.
Ah, Santa's Flight - I've had my eye on this stamp for a while and I finally got it! Here's my first card with it. Santa and his reindeer are stamped on the Twas the Night Before Christmas cardstock and check out the fun way to dress up the twill ribbon. Stamp directly on it to make a customized ribbon border. I love how it looks with the sentiment, don't you? A little cherry ink around the edge of the text cardstock layer and a glue dot with a button on top. A little cherry/white baker's twine finishes off the look. :)
Here's the inside. Simple and fun!

Rita is next up on the blog hop. Have fun and just in case you lose your place on the hop, here's the full list:

Kat http://kateblue.blogspot.com/
Melisa http://melisawaldorf.blogspot.com/
Seleise http://www.amethystcat.blogspot.com/

Rita www.ritaholmes.blogspot.com
Christy http://tencraftyfingers.com/
Stacy http://www.stacy.typepad.com

All supplies used are A Muse Studio and are available in my webstore: www.amusestudio.com/seleise

Have a wonderfully creative day!
 

Tuesday, April 16, 2013

The Pinterest-Inspired Family Bouquet

I saw a wonderful paper floral bouquet with faces for the flower center on Pinterest and immediately pinned it. It would be perfect for my mom's 80th birthday celebration! Thanks to Facebook, one of my brothers and my sister, I got all the photos together. There are 41 in our immediate family -Mom and Dad, 6 kids, 12 grandchildren, 14 great-grandchildren and spouses for some of the kids and grandkids. :) I uploaded photos to Walgreens several times trying to get the faces to be somewhat the same size and then I punched them out with a 1 1/4" punch. I used a muse cardstock scraps for the flowers which I cut with the biggest flower from floral die set 1 and two of the dies from the cupcake toppers die set. The flowers were then attached to a muse studio paper straws and stuck in floral foam. After all the straws were in, I put little glass blocks over the top.

Here's the result:
And, here's a back view. Isn't it pretty with the different colored straws in back and the different a muse papers in front?! On Pinterest, the bouquet was made with wooden bbq skewers which you could definitely do but the straws have a little more grab in the floral foam so it was more stable and that's what I needed. :)

Got to love Pinterest for all the wonderful ideas! Mom was really pleased and it was a lot of fun to put together.

The straws (see accessories) and cardstock (see paper) and dies (see tools)are available in my webstore: www.amusestudio.com/seleise

Thanks for stopping by and have a wonderfully creative day!


Monday, January 21, 2013

Heart Treat Pocket - Big Heart Die project #2

Here's another Valentine's Day treat holder made with the big heart die. This one is super easy and has some other a muse studio dies as part of the look.


This is a  super easy project. Cut 2 big hearts. Put the fronts together and use a crop-a-dile and punch one side of the top of the heart. Turn them back to back and you'll have 1 hole on opposite sides of the heart.

Cool to only punch once and the punch will be level on both sides. That clever idea is from my friend, Sue, the engineer. It's always great to have an engineer around! ;)

So, now that they're back to back, use red-line tape to put them together from the base to about an inch from the top. Don't forget to leave the top open so you can slip a gift card or treat into the pocket.

Once you have the pocket assembled, tie on some sugar polka dot organdy ribbon and add the other die cuts. The bunny, flower and heart are all in the sweetheart/heartbreaker assorted cardstock pack. This is the small bunny die. I just love that die set! To finish off the project, stamp the sentiment in bubblegum ink on a piece of sugar paper and trim.

Here it is hanging up.
Have fun making heart pockets! All products are available in my online store: www.amusestudio.com/seleise

Have a wonderfully creative day!  

Thursday, January 17, 2013

Big Heart Box: Customized treats

In my previous post, there is a tutorial for the big heart box. Here are the customized treats that went inside.

You could do a purchased treat but I thought home-made cookies would be a better way to go. Put two or three cookies in the 2X5 gusset bag. Seal the top with one of the valentine's washi tapes (overlap and make a notched flag like shown for some extra cuteness!) and clip it shut with a mini-clothespin that was sprayed with splash spray. I just spritzed the clothespins with blush and then cherry splash to add color but did not saturate them. I did the same thing to the super cute 3.5" doily that is taped to the back of the cookie bag for a fun look.Now, this may look a little random on its own but when you see everything together, it's a fun gift!
I got in a baking mood on Sunday so I made 3 batches of cookies for my class to choose from for their cookie treat. The cookies in the picture are "Delinquent" Cookies. I got the recipe from my dear friend, "Trouble" . She was one in a million and lived a good long life! The recipe and story of the "delinquents" is at the bottom of this post. In addition to the delinquents, I made monster cookies and butter pecan cake mix cookies. yum!

If you have cookies, you have to have something to drink. Since milk is hard to keep outside of a refrigerator (and doesn't mix well with paper products..lol!), the next best option was cocoa! This is a super easy project. Pour one packet of cocoa into a cone treat bag. Add 16 mini marshmallows. Tie shut with blush baker's cording and cut off the top of the bag to about an inch above the tie.
Finish off your treat box with a card.This is a 3X3 card with a cherry chevron base, a cherry cardstock top and a little valentine's washi tape. A cherry twinkle sticker is perfect for the "flash".  The cherry cardstock layer is popped up over the chevron layer.
 
Here's the inside of the card - simple but great sentiment paired with the camera image. These are from the Sending My Love stamp set. Both are stamped in Titian Ink. A great brown with a tint of greenish gold that matches the washi tape perfectly!
And, finally, here's the finished treat box filled with the goodies. What do you think?

Make one for a friend, spouse, significant other, child, church member, Grandma or whomever. I guarantee, you'll make them smile! Change the colors and make it a birthday treat basket or an Easter basket. Or, put baby socks in it and a gift card for a new mommy. All kinds of fun options. Have fun crafting!

All supplies are a muse studio and are available in my webstore: www.amusestudio.com/seleise

Trouble's "Delinquent" Cookies
Trouble is a nickname for a dear lady that used to live in our home town. She lived to be 95 or 96 years young. She was a wonderful woman who had a great sense of humor.

Trouble made cookies one time for her mother. The recipe was called "Delicious cookies." Her mother couldn't hear well so when Trouble told her the name, her mother replied "Why would they call them delinquent cookies?" She was so tickled that the cookies were named "delinquents" from that day forward.
These are a delightfully crisp and light cookie. 
1 c. margarine
1 c. oil
1 c. brown sugar
1 c. white sugar
1 egg
2 tsp. vanilla
3 1/2 c. flour
1 tsp. salt
1 tsp. soda
1 tsp. cream of tartar
1 c. oatmeal
1 c. rice krispies
1 bag of chocolate chips

Blend margarine and oil. Cream in sugar. Add egg and vanilla and beat well. Add flour, salt, baking soda and cream of tartar. Mix well. Add rice krispies, oatmeal and chocolate chips. Drop on parchment lined cookie sheet. Bake at 350 degrees for 12 minutes.


Enjoy!


Monday, January 14, 2013

Big Heart Die Box Tutorial

The Big Heart Die from A Muse Studio is just wonderful! It's A2 card size and comes with a "love" script word as well. It will fit in most die-cut machines and is amazingly versatile. What? A heart die is versatile? Yep! It's true! I make four projects each month in my class. I decided to feature the heart die in each project for this month's class and wow - what fun it was to play with ideas! Here's what it looks like in its traditional form.

So, the first project has the most steps but you get a super cute result so I decided to make a tutorial to help you make one too. I hope you find it easy to follow!

To get started, you need to cut four hearts from cherry gingham cardstock with the big heart die.

1. Place the heart dies, pattern side up on the a muse studio scor-board. Put the tip of the heart on the 2 1/2" score line and the top of the heart scallops on the 2 3/4" line and score (basically you're scoring 2 1/2" from the tip of the heart). Do this with all four hearts.

2. Place the hearts with the patterns facing each other and use the small hole on the crop-a-dile to punch a hole on each side of the heart. I lined mine up with the bottom of the V of the heart scallop.

3. Lay all four hearts face down on the work surface. Arrange the hearts so the four scored lines make a square.

4. Fold up a couple of the hearts without moving them. Glue the bottom flaps together. Notice that the flaps don't overlap completely so don't glue the full base. You may find it easier to trace the edges with a pencil to mark where your adhesive is going to go.

5. Continue until all four of your hearts are glued together.

6. Fold up the sides. Cut 11" of seattle baker's cording to tie the sides together at the corner. Do this for each corner.
7. Here is what your box looks like. You could glue a square piece of cardstock in the base if you wanted to make your box more sturdy but it's actually pretty good as is.

8. I wanted to turn my box into a goodie box/tray so I added bag filler. Doesn't that look great with the big baker's cording bows and the super cute (and retiring) gingham paper?!

Isn't this fun? Check back soon to see what was put inside the box to finish off the project!

The big heart die is available through the end of February and you can find it in the Valentine's catalog section online. www.amusestudio.com/seleise


Have a wonderfully creative day!


Sunday, December 16, 2012

CAS Gift Bag

Do you like to give little bags of treats at the holidays? Here's a super SIMPLE gift bag that makes a big impact. No adhesive is needed for this version.
This is the a muse studio white paper sack filled with chocolate and other yummy treats. French roast twine is wrapped around the bag and tied in a bow. The three different size poinsettias from the poinsettia die set were cut out of currant felt, rotated to alternate the petals and using the mini clothespin, were clipped onto the twine. That's it - easy peasy!
 I trimmed the bag and rolled it a little and pulled it apart to add interest to the top. The clothespin could have glitter added to it. The poinsettia could have some bling added or be cut out of cardstock or so many other ways but I really wanted a clean and simple (CAS) look to it.
Here's a side view. Wouldn't these be great at each place setting at a Christmas party? Or, wouldn't these be great on all your students desks at school? Or, how about on all of the desks in your office? Or, given out at Sunday School or to thank a friendly clerk at a store or... the list goes on and on.

On a sad note, my heart goes out to all of those affected by the tragedy in Connecticut. I can't even fathom the senselessness of this heart-breaking event. I just learned of a wonderful idea to help the kids at Sandy Hook to help deal with their grief as they move through the counseling process and wanted to share it with all of you: http://www.damasklove.com/drawn-together-a-fundraiser-for-newtown-connecticut/

Hug your loved ones and spread kindness and caring! 

all supplies are a muse studio: www.amusestudio.com/seleise

Tuesday, May 22, 2012

Americana Party Rosette

Are you ready for your Memorial Day or Fourth of July parties? If not, this is a perfect decoration to put together to finish off your look! Pull out your die-cutting machine and start crankin' to put this fun rosette decoration together!!!

The A Muse Studio dies make this a super easy project! First I cut two strips of cherry petite polka dot cardstock with the pointed spellbinder rosette die. The, I cut two blueberry gingham strips with the scalloped edge rosette die. I trimmed the blueberry gingham strips to 1 3/4" width so that the two would layer well so that both colors could be seen. A little red-line tape connected the ends and a little hot glue held the formed rosettes to a base circle. Stars in cherry gingham and plain cherry cardstock were layered on the rosette with the banner die cut in cherry petite polka dot draped across the front. Party from cupcake companion was stamped in cherry ink and layered on as well (some are popped up as you can see in the side view).

What do you think? All supplies (except for the hot glue) are available at www.amusestudio.com/seleise Have a wonderfully creative day!!!

Sunday, December 18, 2011

Mitten "Sleigh" Candy Treat Box

I hope you've enjoyed the last three posts as we walked through the projects from my December class. It's time for the final project and it's a fun one for holiday treats - a mitten "sleigh" candy box. You will see these on my craft fair table next year. :)
I was so excited when this came together because it's just super fun! Cut four mittens - two from each side of the onyx polka dot cardstock. Glue together. (you can skip this step if you use double-sided cardstock - fyi - the a muse studio cardstock is double-sided but the inside is vanilla so you can write on it if making a card). Use the small snowflake die and cut two vanilla snowflakes. *I'd wait until you assembled the mittten and then add the snowflakes so they don't get "beat up" during assembly. I used one glue dot in the center.
Cut a 3 X 3.25 in piece of cardstock and score 1" from the edge on each side. Cut the cardstock as indicated in the graphic. Fold and glue the "flaps" to make a box.
Attach the 1" side of the box to each mitten but not all the way to the bottom of the mitten. Tie on some baker's twine and add some Andes Peppermint Crunch - or your favorite small snack or note or maybe even quarters and you're done.
What do you think? I just got the large mitten die from a muse so I can't wait to make a larger version of this same project. Good times ahead!

All products used are a muse studio and can be purchased anytime at www.amusestudio.com/seleise

Have a wonderfully creative day!

Tuesday, September 13, 2011

You're the Best!

I made this cute little box with my class last night. They loved it! This was their first experience with the A Muse Studio products and the products were a big hit! Especially the inks - great coverage and great colors!
www.amusestudio.com/seleise

The papers were a hit too. Isn't this polka dot paper cute??? And, it makes the most adorable little bag!  So, how do you make this little treat holder? Start with a 8.5" X 5.5" piece of cardstock (half of an 8.5"X11" sheet). Score the 8.5" side at 2", 4", 6" and 8". Turn 90 degrees and score at 2". cut out the corner flap (1/2" x 2" piece). Cut the 2", 4", 6" and 8" score lines to the 2" score line. Fold all your flaps and assemble. Push the top part of the "bag" together and punch two holes. Thread some of the yummy grosgrain ribbon through the holes and there you go! The great thing is that you can make this bag any size - just increase the dimensions. :)

If you want to add a tag, you can use a spellbinder Labels 1 shape as I did, or you can cut a shape with a punch. Stamp your graphic sunflower and then add the sentiment. Now, here is my favorite part!!! Take the FABULOUS Sakuro Quickie Glue Pen and color the edges. The glue will be blue while it's wet but turns clear when its dry. While the glue is wet, dip the edge of the label into the a*muse diamond glitter (love it!) and in moments it will be dry and you'll have a wonderful glittery edge to your tag. I can't wait to do this to Christmas tags!!! By the way - did you notice that half my tag doesn't have glitter? I took the pic before class. I left half glitter free so I could demo the glue pen. :)

To finish your project, punch a hole with your crop-a-dile, thread the grosgrain ribbon through and voilà! A special little treat holder! I used paper from my starter kit so the work table was covered with bags in all different colors. so cute!!! I should have taken a picture!

Have a wonderfully creative day!

Thursday, June 16, 2011

Dress Card and Gift Bag

Here is a super fun project that you can change up and make so many different ways and what can be better than that?!! I was inspired by a card featured on Papercrafts Magazine January issue and downloaded the template from their site. I submitted it to Papercrafts as one of the "inspired by" submissions but wasn't chosen. It's all good because now I can share it with you.

The original card involved sewing and gathering and while I can and have done that, I didn't want to. LOL! So, I started trying to figure out how I wanted to approach the project. While I was pondering, I wrapped a gift and the inspiration struck - use tissue paper!! So, I pulled a sheet out and folded it back up like it originally comes in the package and cut strips on the paper trimmer while it was already folded up (it's so thin that it's no problem sticking the folded up tissue in the trimmer). Then, I used Fiskars Cloud scissors to create a scalloped edge (tip: put a piece of cheap cardstock behind the folded up tissue and it will cut like a dream - without the cardstock - nightmare!). Then, I unfolded the strip and "gathered" the straight edge by pushing the straight edge of the tissue together to make a gathered look. I put strips of scor-tape every half to 3/4 inch or so on the card front skirt part and starting from the bottom (very important to start from the bottom so the tissue doesn't stick!), I peeled off the protective covering of the scor-tape strip, and pressed the gathered edge of the tissue into it (work from one side to the other so you can keep gathering as you go). I let the sides go over the edges and then when it was done, turned it over and trimmed the skirt to the card base. But, one of my friends, trimmed and then folded the edge of each layered tissue as she went ("hemmed it") and made it neat from the beginning. see - that's thinkin'! :)

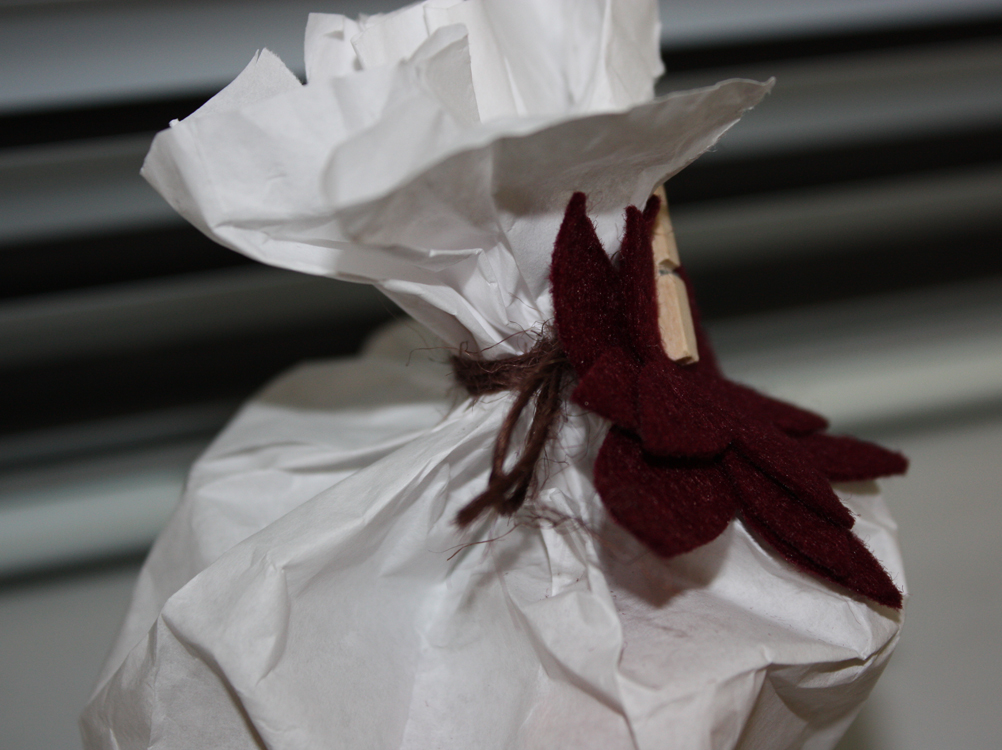
To finish off the "skirt", I added some ribbon to the waist line. But, I felt like it needed more. I added a rhinestone necklace (love the gem embellishments that already have adhesive on them!) But, I still felt like it needed more so added a the big ole ribbon flower at the waistline. ahh - now I'm happy! :) I found these fabulous ribbon trim flowers in the sewing section at Hobby Lobby. Aren't they fun? They come on a roll and can be trimmed apart or used in a strip. So cheery and so many for the price!!! I thought a matching gift bag would be super fun so picked up some small ones at HL and followed the same plan to create the match. Isn't that super cute? What do you think?

The beauty is that you can make this project look so different depending on what background cardstock you start with and what tissue paper you use.
If you use white cardstock like what I've shown, you'll want to use a tissue paper that has a lot of color or pattern as I like the red polka dots but don't love it quite as much as the black/white patterned paper. And, how about mixing the colors - super fun!!!

You can use big rhinestones for chunky necklaces, colored gemstones for bright necklaces, pearls, etc. The options are endless. If you want to host a tea party or a bachelorette party or a birthday party or whatever girly event you might have coming up, use these for place cards. The ideas are endless.

One final note, when you download the pattern from the Papercrafts site. Cut it in half and place the front of the pattern on your already folded cardstock. Save yourself some cutting by doing both layers at once. And,  your front and back of the dress will match perfectly. Have fun playing and creating!!

And, thanks for popping by!

Sunday, October 5, 2008

Fall Harvest and Church Bazaar gift items

I spent the week-end with my youngest niece and nephew so my sister and her husband could work farm ground. I had a blast. The kiddos helped me and my sis with a bunch of projects, including some items for my sister's church bazaar (or "church a czar" as my 3 year old niece called it!).Here are two of the altered items we made using the Bella Flor paper which is discontinued but TAC is selling it for half price (only $10!) until it's gone. I love this cheery paper!!!


Also, I love the new Fall Supplement stamps. The Fall Harvest stamp set is too cute. Here's the little girl holding the sunflower which I've paper pieced with Willoughby paper for a Willoughby swap. The sentiment is from Seeds of Blessing - a great set with many different ways to express your feelings on friendship. The card is finished off with a grey marker under the feet of the little girl to "ground" her and a couple of scor-pal lines to add a simple raised effect. I love this new paper line. Isn't it pretty?! I think this stamp set is perfect for paper piecing, don't you? I can't wait to color it too though and maybe then it will be my favorite to color too. hee hee! I used Goo Gone and Prismacolor pencils to color the sunflower and the hair. Love that technique! I'm still a novice when it comes to coloring but hopefully I'm improving. :)


Time to unpack my stamping stuff! Happy Stamping!