Here's another take on Love and thanks. Isn't it cute with the bow on top! I used Chelsea's tip on how to put together the bow and love how easy it is to get the same color "wings" when using a one-side cardstock. This is the new extra small bow.
And, here's the inside - just repeated the leaves on either side to make a border. Wouldn't you love getting a card with a little something extra inside? :) Me too!
All supplies are A Muse Studio and can be purchased online in my webstore: www.amusestudio.com/seleise
Have a wonderfully creative day!!
Showing posts with label a|s notecard. Show all posts
Tuesday, November 10, 2015
Thursday, October 29, 2015
Notecards - You're in My Thoughts
I'm still here! I'm discovering that new home ownership has a myriad of things that I've not had to worry about for years as a renter. It's still great but the beautiful big tree that has pine needles has shed 17 lawn and leaf bags of needles so far!! 17!!! But, it's my tree so I've got this! :) Also, had my first craft fair of the season a week ago and so am in the process of preparing for the next one - good times! So appreciate everyone that came out and supported our booth!
Love and Thanks is a great set for making notecards to use yourself or to give as birthday or holiday gifts. Wouldn't it be great to make a set of 6, tie them up in a bow with envelopes and leave them at a dinner party for the hostess either instead of or with a bottle of wine! You could change the colors by season for fall and spring and more. If you have an elderly family member or friend who is a shut-in, share a pack of notecards with them. Or, mail a note to them each week with a card in a different color. It's always great to get mail, don't you agree?!
And, don't forget to stamp a little more on the inside! :) Happiness continues...
Pick up the Love and Thanks stamp set along with the ink and paper (and corner chomper!) in my webstore: www.amusestudio.com/seleise
Have a wonderfully creative day!
Love and Thanks is a great set for making notecards to use yourself or to give as birthday or holiday gifts. Wouldn't it be great to make a set of 6, tie them up in a bow with envelopes and leave them at a dinner party for the hostess either instead of or with a bottle of wine! You could change the colors by season for fall and spring and more. If you have an elderly family member or friend who is a shut-in, share a pack of notecards with them. Or, mail a note to them each week with a card in a different color. It's always great to get mail, don't you agree?!
And, don't forget to stamp a little more on the inside! :) Happiness continues...
Pick up the Love and Thanks stamp set along with the ink and paper (and corner chomper!) in my webstore: www.amusestudio.com/seleise
Have a wonderfully creative day!
Thursday, August 20, 2015
Basket Case Notecard
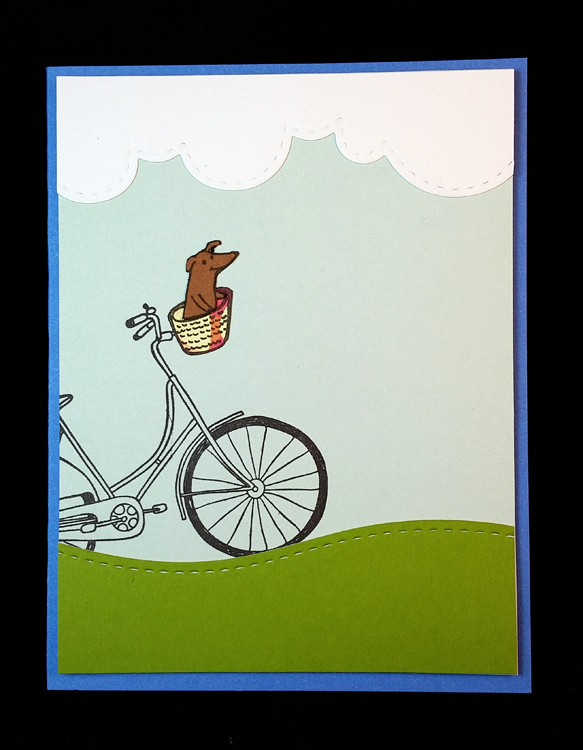
Another bike card - love the Basket Case stamp set and those landscape dies are AWESOME!!!
A simple inside that finishes off this sweet note card.
Shop from home: www.amusestudio.com/seleise
Have a wonderfully creative day!!
A simple inside that finishes off this sweet note card.
Shop from home: www.amusestudio.com/seleise
Have a wonderfully creative day!!
Friday, October 31, 2014
Partial Die Cut Tutorial - Charming Gardeners Notecard
A "charming" partial die cut using Charming Gardeners. I've seen these but hadn't done one myself. What better way to learn than to figure out how to teach it, right? :)
This is an A1 card - 3-1/2" X 5" when folded. I started with a cocoa base, a toffee layer stamped with the hexagon background and a lemon whip layer for the partial die cut.
So, how to make it - the following pics are on orange cardstock so that it's hopefully easier to see how it's done. And, yes, I need to take some goo gone to the back of my dies to remove the washi tape residue. :)
Step 1: Stamp your image on a piece of cardstock and line up your die over the flower. I used an oval from the oval nestabilities. Using a pencil, lightly draw a line on the inside edge of your die on either side of where you want your partial die-cut to go. I did about 1/4" of an inch in length on either side.

This is how it looks when the die is removed. The arrows are pointing to the lines on either side of the flower.
Step 2. Cut straight down from the edge of your cardstock to the inner edge of your drawn lines. Don't cut out from the image. You want to go straight to the line edge because otherwise you'll cut too much from your image to get the effect you want.

Step 3 is to cut around the rest of the exposed image between your two side cuts. Don't worry about being too precise here as you can always go back and clean it up. In our case, we're going to add glitter so the edge won't matter as much.
Step 4. Slide your die back in place going behind the part you just cut out and lining up the inside of the die on the lines you just drew. Use washi tape to hold it in place before running it through the die-cut machine. I used the Grand Caliber but it will work on any die-cutting machine you have.

Here's another view with the full oval shown.
Step 5. Run it through the die machine and remove the die and voilà! A partial die cut!
This is what it looks like once it's cut. Notice that the scissor cut goes to the drawn line which is lower than the die cut. That's okay - it's right next to the image so won't show when glued down. Carefully erase the pencil lines and continue on with your card. Isn't that fun? And, it's easy once you do one or two. :)
So, here's the front again. I added lemon whip glitter to the flower petals and then stamped and glittered on the inside as well.
I hope you've enjoyed this tutorial. Have fun making your own partial die-cut cards!
Have a wonderfully creative day!
This is an A1 card - 3-1/2" X 5" when folded. I started with a cocoa base, a toffee layer stamped with the hexagon background and a lemon whip layer for the partial die cut.
So, how to make it - the following pics are on orange cardstock so that it's hopefully easier to see how it's done. And, yes, I need to take some goo gone to the back of my dies to remove the washi tape residue. :)
Step 1: Stamp your image on a piece of cardstock and line up your die over the flower. I used an oval from the oval nestabilities. Using a pencil, lightly draw a line on the inside edge of your die on either side of where you want your partial die-cut to go. I did about 1/4" of an inch in length on either side.

This is how it looks when the die is removed. The arrows are pointing to the lines on either side of the flower.
Step 2. Cut straight down from the edge of your cardstock to the inner edge of your drawn lines. Don't cut out from the image. You want to go straight to the line edge because otherwise you'll cut too much from your image to get the effect you want.

Step 4. Slide your die back in place going behind the part you just cut out and lining up the inside of the die on the lines you just drew. Use washi tape to hold it in place before running it through the die-cut machine. I used the Grand Caliber but it will work on any die-cutting machine you have.

Here's another view with the full oval shown.
Step 5. Run it through the die machine and remove the die and voilà! A partial die cut!
This is what it looks like once it's cut. Notice that the scissor cut goes to the drawn line which is lower than the die cut. That's okay - it's right next to the image so won't show when glued down. Carefully erase the pencil lines and continue on with your card. Isn't that fun? And, it's easy once you do one or two. :)
So, here's the front again. I added lemon whip glitter to the flower petals and then stamped and glittered on the inside as well.
I hope you've enjoyed this tutorial. Have fun making your own partial die-cut cards!
Have a wonderfully creative day!
Monday, October 20, 2014
Fun with Splash and Feathers! (and, sanding too!)
Ah - splash! So many possibilities with these wonderful color sprays. I love them!
This card has several techniques so let me start with the overall look and then break it down. First, you cut an oval from a piece of mermaid cardstock and then stamp feathers in versamark on the card and french roast insert piece. Why stamp in Versamark, you ask? When you stamp in versamark and then go over the stamped image with the sanding block, it brings out the image and it makes a wonderful background.
Here's a close-up. It's imperfect and fabulous! You aren't looking for perfection. You want that sanded, textured look. Isn't it great?!
Once you have the background done, take the script background and stamp it with versamark and then heat emboss it with satin pearl embossing powder. Then, use a piece of cardstock and mask off half a feather and "splash" it. Take a paper towel and remove the excess splash. Then, take your cardstock and mask off the first side and splash the other and repeat until all the feathers are done. This will give you the feather spine and it looks so cool. Once all three feathers are done, splash them all with Golddust Splash and then you'll have a lovely shimmer on your feathers. Tie a little vanilla twine around them and pop them up over your sanded feather background. :)
Here's a close-up of the feathers. Aren't they great?!
And, here's the inside - a strip of sanded Versamark feathers.
So, what do you think? Are you going to try sanding over versamark? It works best over a white-core cardstock like the A Muse cardstock.
If you need some feather stamps, check them out in the holiday stamps in my webstore: www.amusestudio.com/seleise
Have a wonderfully creative day!!
This card has several techniques so let me start with the overall look and then break it down. First, you cut an oval from a piece of mermaid cardstock and then stamp feathers in versamark on the card and french roast insert piece. Why stamp in Versamark, you ask? When you stamp in versamark and then go over the stamped image with the sanding block, it brings out the image and it makes a wonderful background.
Here's a close-up. It's imperfect and fabulous! You aren't looking for perfection. You want that sanded, textured look. Isn't it great?!
Once you have the background done, take the script background and stamp it with versamark and then heat emboss it with satin pearl embossing powder. Then, use a piece of cardstock and mask off half a feather and "splash" it. Take a paper towel and remove the excess splash. Then, take your cardstock and mask off the first side and splash the other and repeat until all the feathers are done. This will give you the feather spine and it looks so cool. Once all three feathers are done, splash them all with Golddust Splash and then you'll have a lovely shimmer on your feathers. Tie a little vanilla twine around them and pop them up over your sanded feather background. :)
Here's a close-up of the feathers. Aren't they great?!
And, here's the inside - a strip of sanded Versamark feathers.
So, what do you think? Are you going to try sanding over versamark? It works best over a white-core cardstock like the A Muse cardstock.
If you need some feather stamps, check them out in the holiday stamps in my webstore: www.amusestudio.com/seleise
Have a wonderfully creative day!!
Sunday, September 14, 2014
Pretty Peonies - Same Colors, Two Variations
Pretty Peonies 2 is one of the new sets this year and it's so pretty because it's the buds of the peonies before they've bloomed. I love peonies and always think of time spent at home and at the cemeteries in the spring. We always went to the cemeteries on Memorial Day and would put home-grown flowers at all the graves. We'd take the peonies, iris, daisies, sweetheart roses and whatever else was blooming to put in the buckets and jars and cans sitting around. As I got older, I'd go cut flowers and put together the arrangements. We were always at the cemeteries before and after Memorial Day as
Grammie put out Rebekah flags at Couch cemetery and Mom and Dad had
flags to put out at the Randall cemetery. I loved helping and it was always a special time to hear stories of family from Mom and Grammie and spend time with Dad following the hand-written map to put the flags on the veteran's graves. Great memories.
So, here are two variations of the same card. The first I used in my class this month. I decided to leave it sentiment free so it could be used for a birthday, sympathy, get well, thinking of you or just as a pretty notecard.
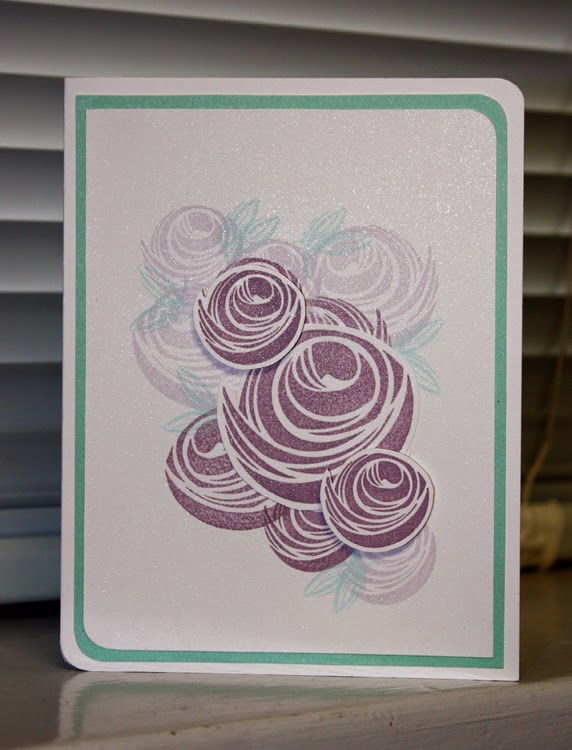
This card is on vanilla cardstock with a layer of bermuda in-between. The peonies are stamped with amethyst and heather and the leaves are in bermuda. The 3/8" vanilla twill is also stamped with leaves using the bermuda ink. I love that the vanilla twill takes ink so beautifully, don't you?
As you can see below, more peony groups are stamped inside. Isn't that pretty?
The second variation uses the same inks and cardstock. The corners have been rounded on opposite corners and after the card was assembled, it was sprayed with stardust finishing spray. It's a pretty and subtle touch that enhances the card, don't you think?
If you'd like to make your own Pretty Peonies 2 card, you can pick up the products in my webstore.
Pretty
Peonies Notecard
Stamps: Pretty Peonies 2, p. 41, $13.99
Cardstock: Vanilla
(40), p. 116, $7.50
Bermuda, (20), p.
113, $7.50
Ink: Amethyst, p. 112, $5.95
Heather,
p. 114, $5.95
Bermuda, p. 113,
$5.95
Other: Vanilla
twill 3/8”, p. 124, $5.95 (10 yds)
3D
Foam (442 pieces), p. 136, $3.95
Have a wonderfully creative day!!
Thursday, July 17, 2014
Beautiful Day Notecard
Here's another one of our new stamp sets - Beautiful Birthdays. Love it!! It's so pretty and soft and wonderful. I might be doing a variation on this card for my July class or I might go a totally different way. will have to think about it some more. But, this set has many, many possibilities. Did you see the sponged masked border sympathy cards that I posted recently? This stamp set was used with that too.
All of these stamps and sentiments and wonderful papers are available in my webstore:
www.amusestudio.com/seleise
Have a wonderfully creative day!
All of these stamps and sentiments and wonderful papers are available in my webstore:
www.amusestudio.com/seleise
Have a wonderfully creative day!
Wednesday, July 9, 2014
Life is a Journey
The first time I flew anywhere ever was to Europe. Yep. I was 21 years old and decided I was going to study in France for the summer. I'm so lucky that I loved flying because it would have been a miserable trip otherwise. I had quite a start to my journey but that's a story for another day (when I have four hours to tell it - lol!). Anyway, Paris was wonderful and will always hold a special place in my heart. I studied in Dijon and spent every week-end in a different place as I had a Eurail pass and could just hop on the train. What a fabulous experience all of that was! The funny thing is that over the summer I became great friends with a girl from Kansas City. small world! I hope everyone takes time to travel as you learn so much about other cultures but also learn so much about yourself and your own country.
I love how this card turned out. Layered and yet simple in design. All of the stamps are from Come Fly With Me. Love this set!
www.amusestudio.com/seleise
Have a wonderfully creative day!
I love how this card turned out. Layered and yet simple in design. All of the stamps are from Come Fly With Me. Love this set!
www.amusestudio.com/seleise
Have a wonderfully creative day!
Tuesday, July 8, 2014
Touch of Nature Notecard
A little touch of nature on blackberry and onyx and a little onyx polka dot ribbon. A simple and sweet notecard.
Here's the inside.
Have a wonderfully creative day!
www.amusestudio.com/seleise
Here's the inside.
Have a wonderfully creative day!
www.amusestudio.com/seleise
Monday, June 23, 2014
Emboss Resist with Splash Tutorial
Emboss resist with Splash is so super easy and the results are so AWESOME! Here is a tutorial to help you make your own splashed notecards!
First, stamp your image with Versamark. You want to use a solid image stamp. I used one of the solid modern zinnia stamps. Love that set! So, can you see that the image is lightly there on the vanilla cardstock? The versamark ink has some tackiness to it so the embossing powder will stick to it.
The next step is to pick your embossing powder and pour it over the stamped image. Be generous and really get it covered. Shake off the excess and pour it back into the bottle to use the next time. I'm using white embossing powder from A Muse Studio.
So then you hit it with the heat gun and it melts. See the one on the right - it's melted and the others are still powdery. I love watching the powder melt - it's like magic!
Now they're all embossed and it's ready to spray!
After you spray it, wipe off the excess from the embossed flowers with a paper towel and let it dry for a bit. I used Pistachio splash for this one but you can use any color that you want. Scroll down to see other colors!
And, here's the finished project. :) I like to layer it on onyx and then back on a vanilla cardstock base. A group of these makes a wonderful gift of notecards. You can stamp inside but I generally leave this design blank.
look at all these gorgeous colors! A Muse carries Splash is so many colors. You can dab, spritz or spray with it. You can even paint with it. Such a fun product!
So, here it is again - the cast of characters - versamark, Modern Zinnia solid stamp, white embossing powder and pistachio splash. Have fun playing!!
And, here's where you can pick up the supplies to make your very own embossed resist with Splash! www.amusestudio.com/seleise
Have a wonderfully creative day!
First, stamp your image with Versamark. You want to use a solid image stamp. I used one of the solid modern zinnia stamps. Love that set! So, can you see that the image is lightly there on the vanilla cardstock? The versamark ink has some tackiness to it so the embossing powder will stick to it.
The next step is to pick your embossing powder and pour it over the stamped image. Be generous and really get it covered. Shake off the excess and pour it back into the bottle to use the next time. I'm using white embossing powder from A Muse Studio.
So then you hit it with the heat gun and it melts. See the one on the right - it's melted and the others are still powdery. I love watching the powder melt - it's like magic!
Now they're all embossed and it's ready to spray!
After you spray it, wipe off the excess from the embossed flowers with a paper towel and let it dry for a bit. I used Pistachio splash for this one but you can use any color that you want. Scroll down to see other colors!
And, here's the finished project. :) I like to layer it on onyx and then back on a vanilla cardstock base. A group of these makes a wonderful gift of notecards. You can stamp inside but I generally leave this design blank.
look at all these gorgeous colors! A Muse carries Splash is so many colors. You can dab, spritz or spray with it. You can even paint with it. Such a fun product!
So, here it is again - the cast of characters - versamark, Modern Zinnia solid stamp, white embossing powder and pistachio splash. Have fun playing!!
And, here's where you can pick up the supplies to make your very own embossed resist with Splash! www.amusestudio.com/seleise
Have a wonderfully creative day!
Wednesday, April 30, 2014
Fluttery Notecard
Something floaty and fluttery is popping up today. Layered Crepe Paper Butterflies!
Three crepe paper butterflies were die-cut, nestled on top of the other and with just a teeny bit of Mono Aqua glue, glued in the middle. This leaves the wings free to float. Pearl stickers were added to bring the body of the butterfly to life. Simple and pretty. I haven't decided if I'm going to add a sentiment or just leave it as a notecard to flutter into someone's home. What do you think?
Tuesday, April 22, 2014
Spring Notecards
It's finally looking and feeling like Spring! woo hoo! Old Man Winter outstayed his welcome this year so am glad to see the redbud trees blooming and the grass turning green and the temperatures becoming more spring-like. So, in that vein, I created some spring notecards using the Sunny Side of Life stamp set.
I put four cards in a set and gave them to some special people to brighten their spring days. :) These are perfect to have on hand and they fall in the quick and simple category as it's simple stamping on lemon whip layered on vanilla.
Here's the inside. Subtle and pretty and ready for a friendly note. I need to make a bunch of these up to keep on hand. I made some for thank you cards too. They'd also work for thinking of you or get well cards too. One stamp set, two colors of cardstock and four colors of ink. That's it. :)
Have a wonderfully creative day!
I put four cards in a set and gave them to some special people to brighten their spring days. :) These are perfect to have on hand and they fall in the quick and simple category as it's simple stamping on lemon whip layered on vanilla.
Here's the inside. Subtle and pretty and ready for a friendly note. I need to make a bunch of these up to keep on hand. I made some for thank you cards too. They'd also work for thinking of you or get well cards too. One stamp set, two colors of cardstock and four colors of ink. That's it. :)
Have a wonderfully creative day!
Wednesday, April 16, 2014
Thinking of You or Notecard
This quick and simple card uses washi tape, everything's rosy paper pack and vellum cardstock die cuts to add visual interest. Isn't the washi tape kind of great on the gingham cardstock?! I love it! And, I wish the photo showed it better but the washi swallows have a touch of golddust spritzed across the top of them so they shimmer a bit. Some pearl sequins finish off the look. Easy peasy and yet a beautiful notecard or get well or thinking of you card.
Here's a close-up of the swallow. Try to pretend you can see a bit of gold shimmer. I can if I concentrate real hard. lol! :)
Have a wonderfully creative day!
Here's a close-up of the swallow. Try to pretend you can see a bit of gold shimmer. I can if I concentrate real hard. lol! :)
Shop Online
Thinking
of You (or notecard):
Stamps: Essential Sentiments, p.98, $25.99
Cardstock: Gingham
(35), S, $14.95
Sage
(20), p. 110, $7.50
Vellum (cardstock),
p. 119, $6.50
Paper: Everything’s
Rosy 6X6 Pattern, S, $5.99
Dies: Swallows die set, p. 129, $5.95
Ink: Memento Tuxedo Black, p. 114,
$5.45
Splash: Golddust,
$6.95
Other: Pearl
Sequins, S, $1.99
Glue
Dots, p. 136, $3.95
Washi
– Keep Calm, p. 121, $15.95Have a wonderfully creative day!
Subscribe to:
Posts (Atom)